
Creating EC2 Instance
Let’s learn about the famous and most discussed service among AWS Services, EC2. It stands for Elastic Cloud Compute. It’s the servers (Windows, Linux, Unix, and others) that you will create in the AWS Cloud account.
There are 7 Steps to create it.
Step 1) Decide what type of OS you want for your Server.
You will see four options like this.

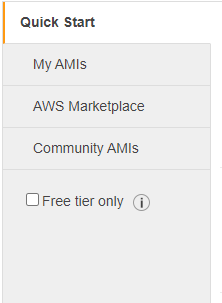
Quick Start: will give you available Servers which people use frequently.
My AMIs: When you create a server add the desired software and configuration, you can also save it as AMI (Amazon Machine Image). This Machine/Server will be kept in My AMIs, and next time you want the same Server with all the software/data in it, you can create a server with this saved AMI. It saves your time to make the same Server a second time. But remember, it will cost you since it will consume storage space.
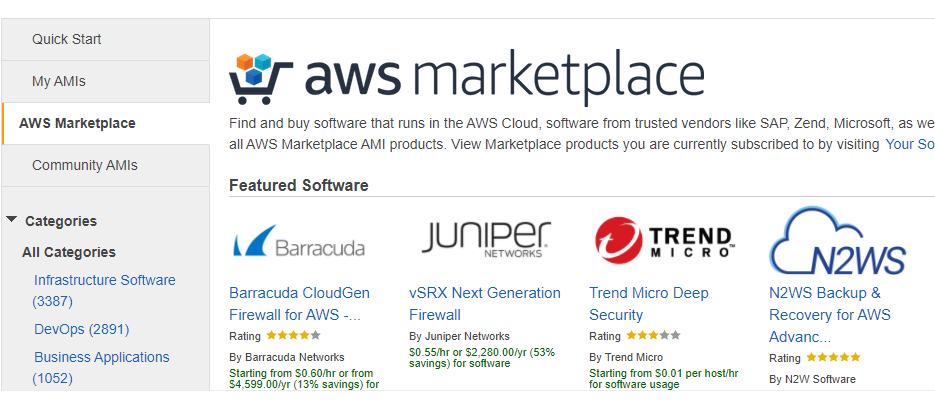
AWS Marketplace: You can find and purchase software that runs on the AWS Cloud, including software from well-known companies such as SAP, Zend, and Microsoft, as well as a variety of open source options. These are chargeable, but you will get most of the software pre-configured, which we need for development or production. You can also sell your AMI in the marketplace.
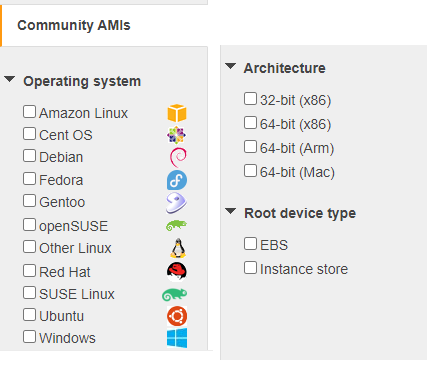
Community AMIs: Whenever you create an AMI, you can add permissions to publish it (By permitting the public). These types of AMIs are called “Community AMI”. These are AMIs from AWS users and have not been validated by AWS. You can use it at your own risk because it may contain malicious software too.
Let’s select Amazon Linux 2 AMI(HVM)- Kernel 5.10, SSD Volumn Type – ami-0e0ff68cb8e9a188a (64-bit x86) / ami-0e202421a293db23a (64-bit Arm)

Step 2) Choose the Instance type: Now, you have to select instance types how much CPU, Memor, Storage, and Network Capacity you want.
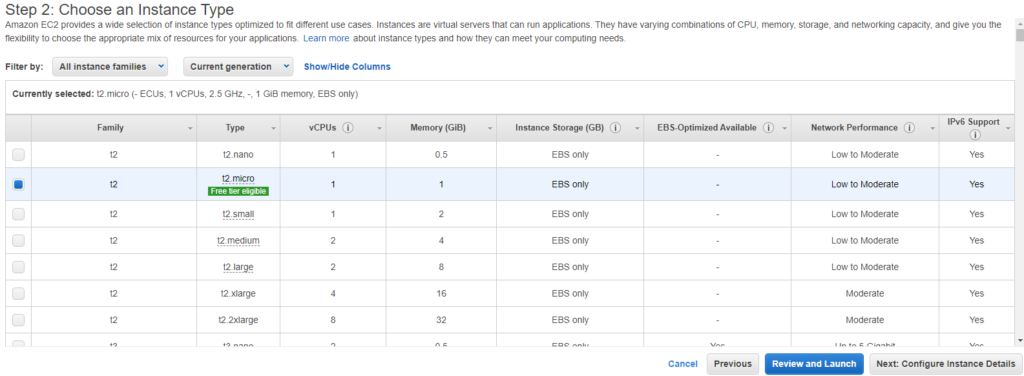
By Default, t2.micro will be selected. We will go with this only since it is free.
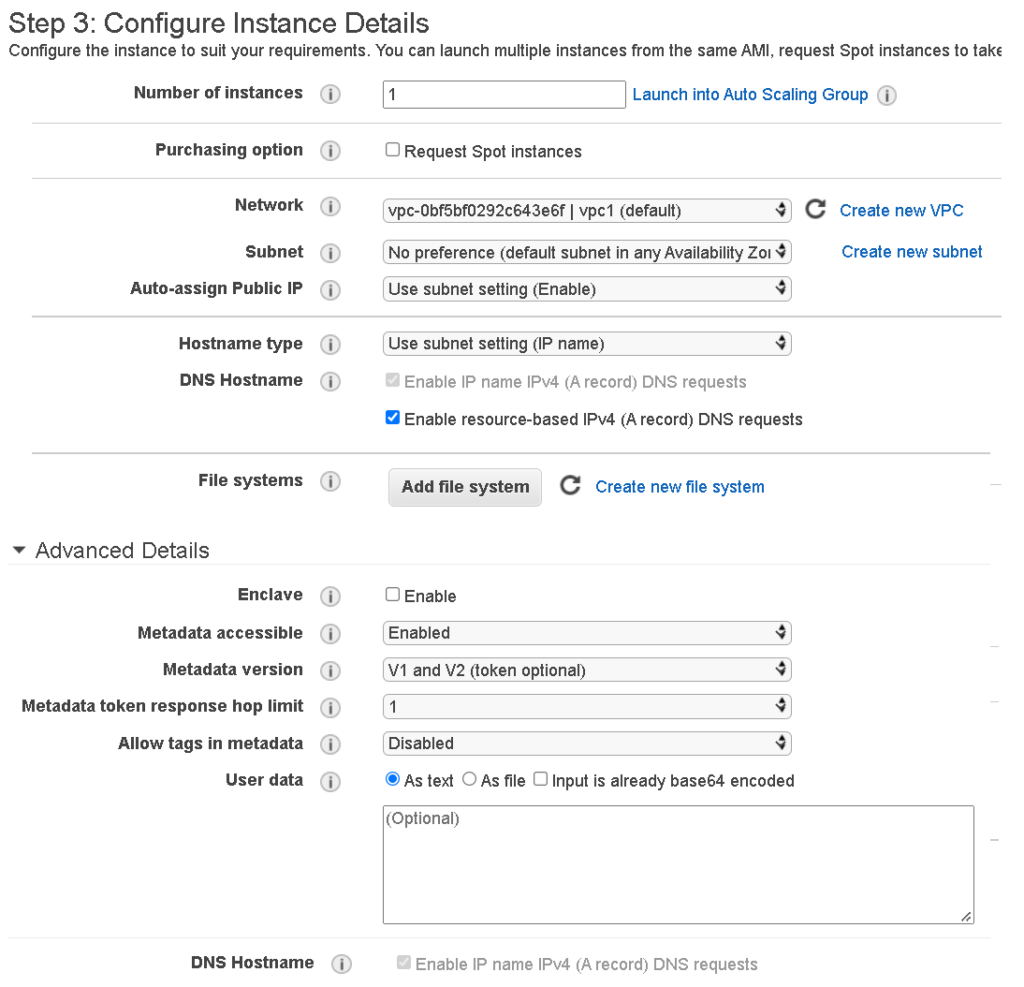
Step 3) Configure Instance Details:
We can decide how many instances we need, it may be 1, 2 to any number we want. We can decide the purchasing options, VPC, Subnet, and many more advanced features. Remember of the important detail we can give here is User Data. User Data basically have data and commands which we want in our server after its starts. The commands in the User Data text will execute automatically and in all of our instances which we are going to spin, will have that data.
For example: to create an apache server you can use this script.
It will install an apache server and an index.html will be created.
Put the server IP address in the browser, you will find the server is up and running and the index.html file will be accessible.
#!/bin/bash
sudo su
yum update -y
yum install -y httpd.x86_64
systemctl start httpd.service
systemctl enable httpd.service
echo “Hello World from $(hostname -f)” > /var/www/html/index.html
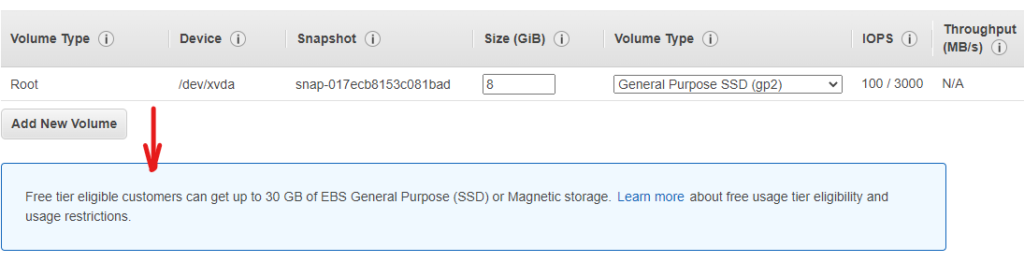
Step 4) Add Storage:
Now for our instance, we can decide the type, size, IOPS, and Throughput. Like by default for Windows Server we have C: Drive, you can choose to increase the default size or add another drive. Like drive D: with 100 GB storage. Remember if you add this extra space you have to pay for this storage.
Step 5) Add Tags
The tag consists of key-value pair, for example, if I will create 10 Servers, I will give them names so that I can search them later on with the help of the tag. Even tags are very useful which we will see in higher-level hands-on. Example: Key = Name value=Project_A_Server1
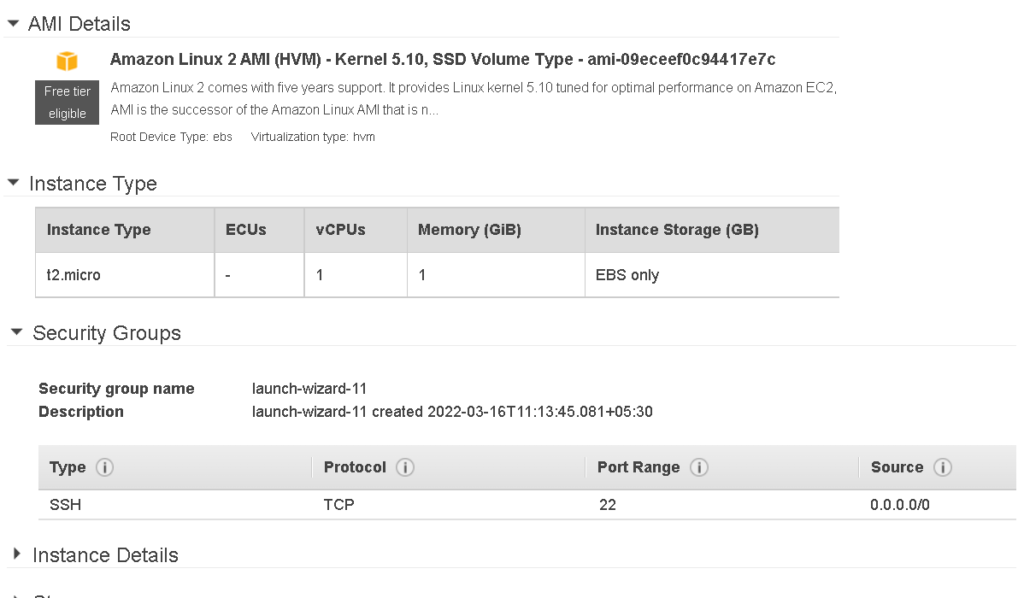
Step 6: Configuring Security Group (SG)
The security group is like a firewall that controls the traffic for the instance. We can allow specific traffic to reach our instance. Like, I want the instance can be accessed remotely, so in the case of Windows we have to give RDP type and 0.0.0.0/0 (means anyone in the world can access it). In the case of Linux, we will go for SSH. You can give the name to SG (by default it will give the name like launch-wizard-11)

At this step, you can decide which protocol should be allowed to communicate. Check in the example, we have SSH using TCP protocol to connect with this Linux machine. Port rage is 22 and in the source column Custom for 0.0.0.0/0 is selected. We have some more options for Source like 1) Custom, 2) Anywhere 3) My IP
Step 7) Review Instance Launch
Finally, we can review the configuration and edit it before spinning the server.
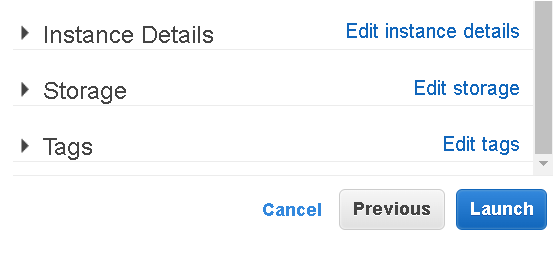
Click on Launch and your instance will be created.
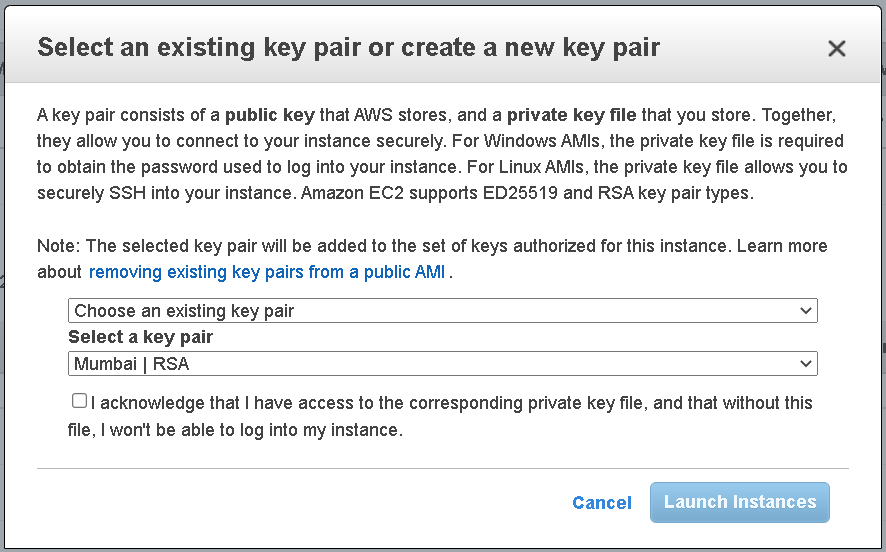
Once you click on Launch it will prompt for selecting a key, if you have already a key select it or create a new one and save it. Remember this is one of the important steps, once the key is lost you will not be able to connect with this newly created Server.
How to connect Linux machine through Putty Click Here